
Native client connections with Azure Bastion
Azure Bastion supports native client connections, allowing you to connect to virtual machines directly from your desktop. In this blog post, we’ll explore how easy, useful, and intuitive this feature is. Native client connections are only available on the Standard and Premium Azure Bastion SKUs. Developer and Basic SKUs do not support this feature. With a native client connection, you can, for example, transfer files directly between the cloud instance and your computer, which can be highly beneficial. In this article, I’ll describe how to establish native client connections using macOS and Windows.
Prerequisites
Before establishing the connection, you need to have Azure Bastion deployed in your tenant along with a virtual machine to log into. Please note that you need the Standard or Premium SKU to use native client connections. Your local computer must have the Azure Command-Line Interface (Azure CLI) installed, along with the bastion and ssh extensions. To install the required extensions, run: az extension add -n extensionName. If they are already installed, ensure they are up to date with: az extension update -n extensionName.
The user that is connecting through Bastion needs to have reader role on virtual machine and its NIC with private IP, as well as reader role on the Azure Bastion resource. In case Entra ID sign-in method is used user also needs to have either Virtual Machine Administrator Login or Virtual Machine User Login role.
Establishing the connection
There are multiple ways to connect to your virtual machines. You can use either SSH or RDP and depending on your setup you can use Entra ID login, username and password, or key pair. In these examples, we mainly use a username and password to keep things simple. First, log in to Azure using the following command: az login.
Depending on the use case, one of the following connection commands can be used:
az network bastion rdp –name “<BastionName>” –resource-group “<ResourceGroupName>” –target-resource-id “<VMResourceID>”
az network bastion ssh –name “<BastionName>” –resource-group “<ResourceGroupName>” –target-resource-id “<VMResourceID>”
You must also specify the authentication type using –auth-type. Depending on the method, you either need to specify –ssh-key (with filepath for using SSH key pair) or –username (followed by your username if you are using username and password).
You can also use the private IP address of a virtual machine with –target-ip-address instead of –target-resource-id. However, using this method Entra ID authentication and custom ports and protocols are not supported. So if you have changed default RDP or SSH ports to something else you are unable to connect using target resource’s private IP address and should use target resource id instead.
Rather than connecting directly, you can also use a Bastion tunnel for connections. Using bastion tunnel is the way if you want to take RDP connection to Windows machine from macOS or Linux. Also, if you need to copy files between Linux VM and your own computer Bastion tunnel is your method of choice.
How to find target-resource-id?
Retrieving a virtual machine’s resource ID may seem straightforward, and it is—if you know where to look. You can obtain the Resource ID using the following methods.
The first method is to open the Azure Portal, navigate to the virtual machine, and click JSON view on the Overview page. Resource ID can then be found in the text box on a blade that opens.

Another method is to use Azure CLI, which is likely already open. Running az vm list displays all virtual machines in your subscription. You can find the id field in the output. As this lists all of the Virtual machines it can be tedious task to find the right id. You can list virtual machines in certain Resource Group using az vm list -g “<ResourceGroupName>” which can lower the amount virtual machines listed but the amount of details is still quite plentiful. However, we can go a bit further and pipe a grep to find the exact machine name among the fields. With command az vm list -g “<ResourceGroupName>” | grep -w “id” | grep -w “<VirtualMachineName>” we’ll get nice output that only states the Resource ID of that particular virtual machine. Listing VMs by resource group isn’t required, but you can use grep after az vm list to filter the results.”

After retrieving the Resource ID using one of these methods, you can copy and use it in the connection command. However, should you want it to a variable and you are running commands in Powershell you can do the following:
$resource = az vm show -g jukka-test-rg -n vm-test-01 | ConvertFrom-Json
$resourceID = $resource.id
This gives you virtual machines Resource ID in variable that you can use when connecting.
Connections using macOS
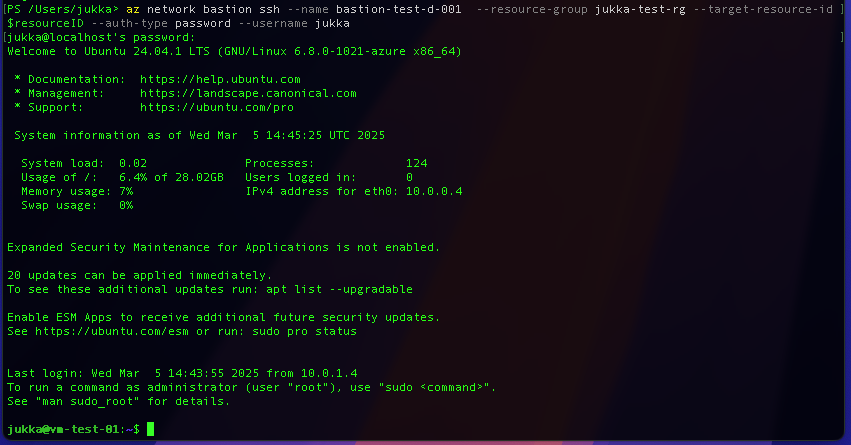
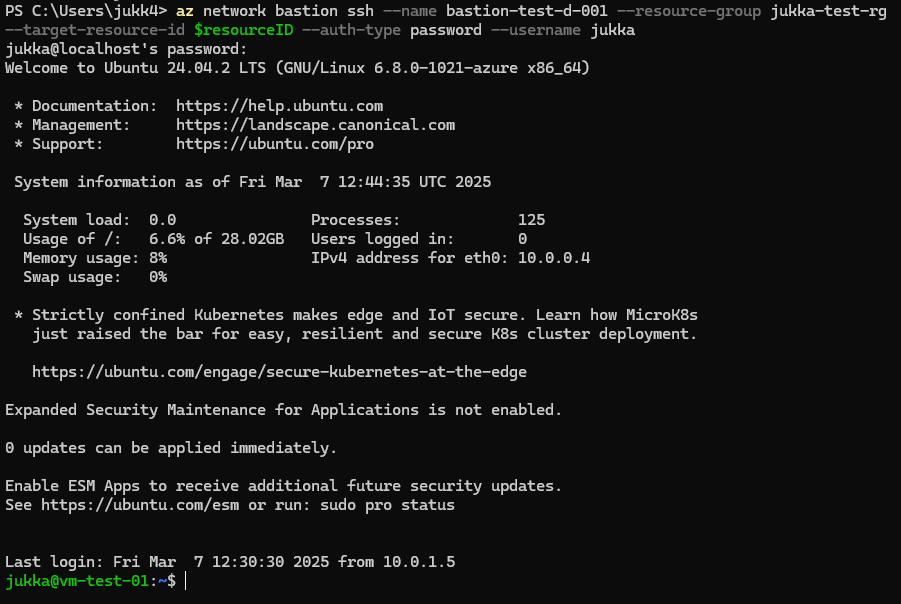
On macOS, you can use the built-in Terminal. To connect, I stored the virtual machine’s Resource ID in a variable and used the following command:
az network bastion ssh –name bastion-test-d-001 –resource-group jukka-test-rg –target-resource-id $resourceID –auth-type password –username jukka
Now that we have connected to a Linux virtual machine, how can we do the same for a Windows VM? Well, if you are connecting using SSH the process is exactly the same. Please note that you need to have OpenSSH Server installed and running on your Windows virtual machine. To configure Windows properly please refer to this guide.
Bastion tunnel for RDP and file transfer
If you need to connect from macOS to a Windows VM using RDP or transfer files to a Linux VM, you’ll need a Bastion tunnel. Note: Without root privileges, you cannot use local ports below 1024. If you must use a port below 1024, you need to run the command with sudo.
You can open a Bastion tunnel using the following command:
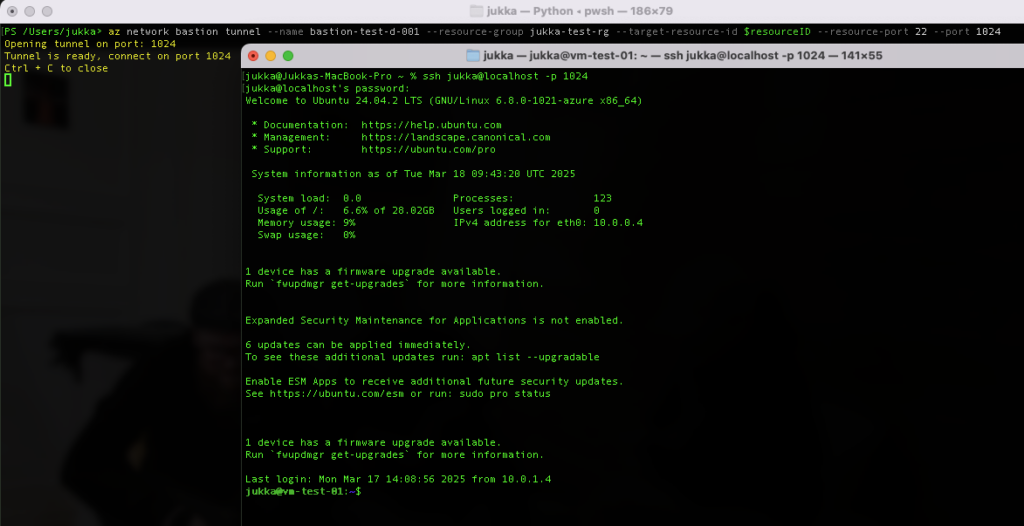
az network bastion tunnel –name bastion-test-d-001 –resource-group jukka-test-rg –target-resource-id $resourceID –resource-port 22 –port 1024
To establish connection a new Terminal window can be opened. Remember, since the tunnel is open, you must SSH to the local machine port you specified in the command: ssh jukka@localhost -p 1024
For the RDP connection towards Windows virtual machine we need a tunnel as well as Windows App which can be found in App Store.
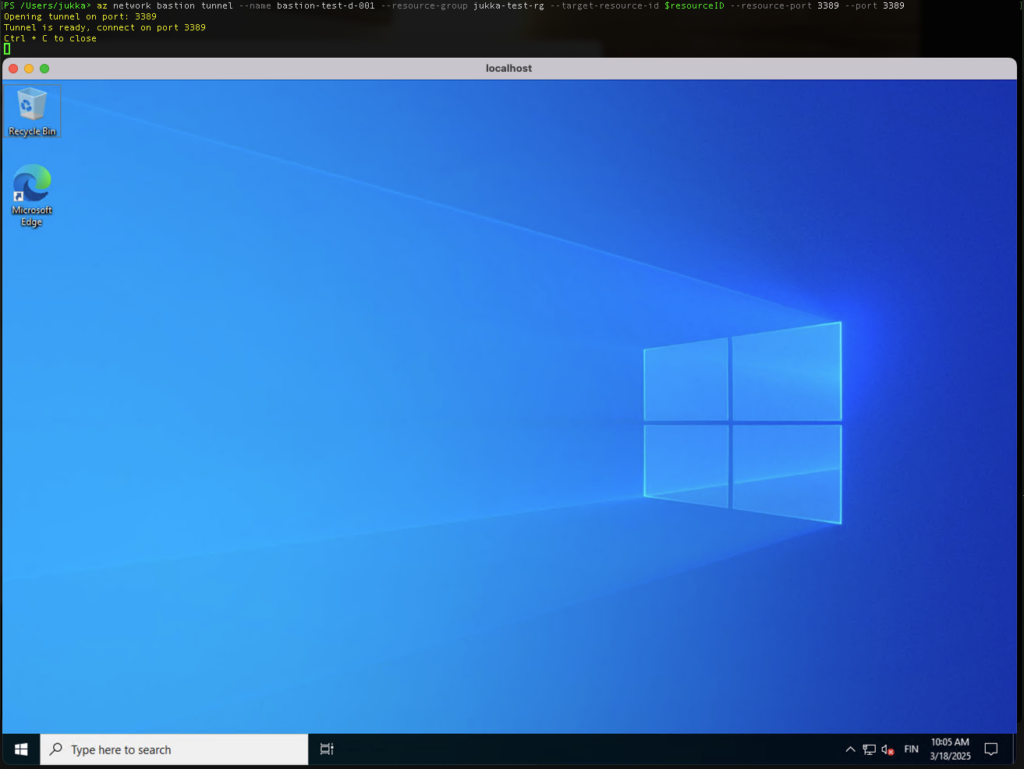
First open a tunnel to virtual machine’s port 3389 (or if you have specified custom port for RDP use that one). For local port 3389 can also be utilized as then there is no need to specify other port in Windows App. Command to use for opening a tunnel:
az network bastion tunnel –name bastion-test-d-001 –resource-group jukka-test-rg –target-resource-id $resourceID –resource-port 3389 –port 3389
In the Windows App, add a new PC. Simply enter localhost in the PC name field, and you’re good to go. If you used a different local port, enter localhost:<port> instead.
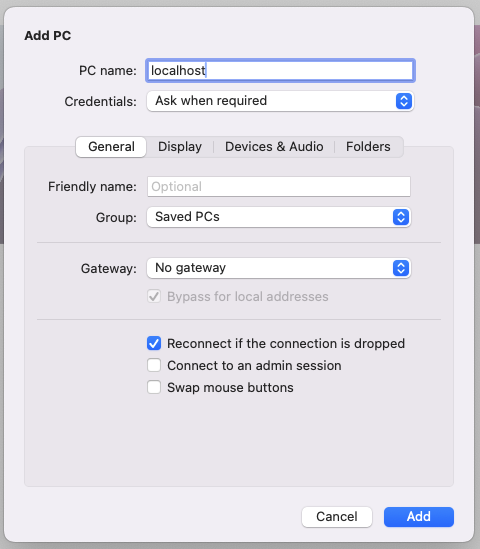
After adding your machine, double-click the icon, enter your username and password, and you’re in!
Connections using Windows
SSH connections from Windows work exactly the same as in the macOS section. You can use the same command and expect the same output:
az network bastion ssh –name bastion-test-d-001 –resource-group jukka-test-rg –target-resource-id $resourceID –auth-type password –username jukka
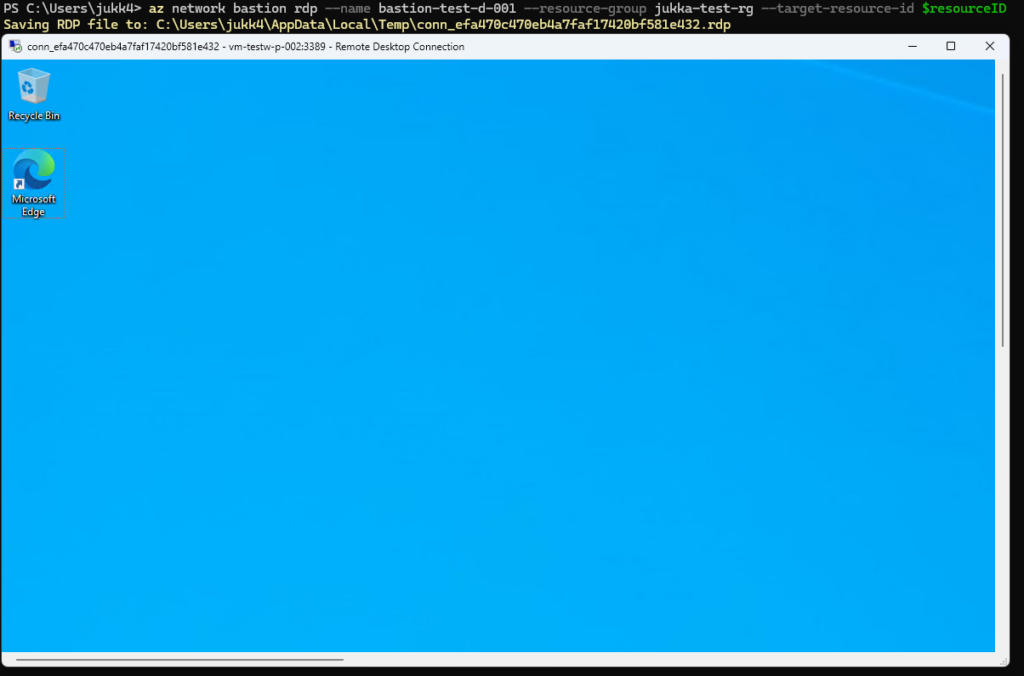
If you need to RDP into Windows virtual machine from your own Windows computer it’s relatively easy with native Remote Desktop Connection client. This can be achieved by following command:
az network bastion rdp –name bastion-test-d-001 –resource-group jukka-test-rg –target-resource-id $resourceID
You don’t need to specify –auth-type or –username in this command.
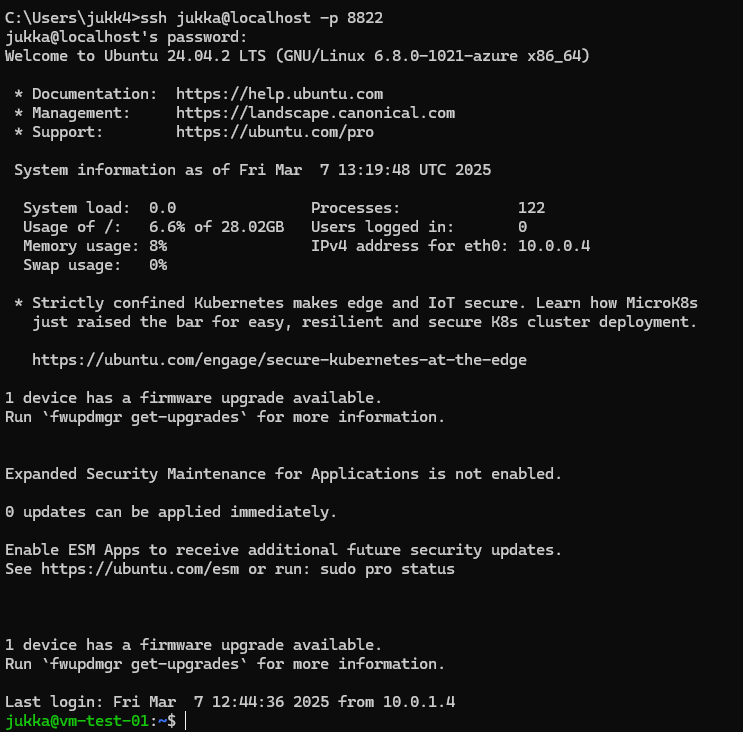
Bastion tunnels work well on Windows. In the command you need to specify remote and local ports. –resource-port is the port on remote machine and –port is local port that you want to assign for tunnel. Tunnel can be opened using following command:
az network bastion tunnel –name bastion-test-d-001 –resource-group jukka-test-rg –target-resource-id $resourceID –resource-port 22 –port 8822

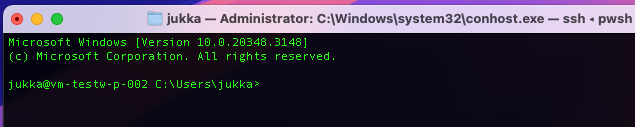
Once the Bastion tunnel is open, you can use Windows Command Prompt to connect to the virtual machine. Remember, since the tunnel is open, you must SSH to the local machine port you specified in the command.
Conclusion
Azure Bastion is a great tool to be able to have connections to virtual machines without exposing them to public internet. Using the Azure portal for connections is straightforward, but Native Client connections have a learning curve. However, once you get the hang of them, they are fairly easy to use. I recommend saving connection strings somewhere so you don’t need to re-type them every single time.
Azure Bastion is a great tool for securely connecting to virtual machines without exposing them to the public internet. Using the Azure portal for connections is straightforward, but Native Client connections have a slight learning curve. However, once you get the hang of them, they are fairly easy to use. I recommend saving connection strings somewhere so you don’t need to re-type them every single time.
One of the biggest advantages of Native Client connections is the ability to transfer files between your local machine and a virtual machine. Additionally, you don’t need to use a web browser and can leverage your preferred native tools.
Whether you’re connecting via SSH, RDP, or transferring files, Native Client support works well across both Windows and macOS. However, if you’re using Bastion tunnels on macOS, keep in mind that local ports below 1024 require root privileges—so it’s best to stick to ports 1024 and above.